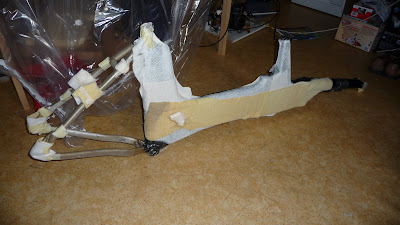
The first part is quickly done: the bag itself does not stick to the frame. The result is a frame still nicely wrapped in peelply and breather. This is the laminated right hand side:
 And this is the still bare left hand side:
On the left side you can see the peelply in white and red covering the foam.

A detail of the front seatpost shows that the breather has taken up a fair amount of the excess resin, just as I wanted it. The second layer of breather lower on the frame did not really fill with epoxy, so it probably was overkill.

The area around the bottom bracket shows the (here invisible) peelply with cured epoxy and little ridges of resin on the outside. Without the peelpy the entire frame would come out of the bag like this, only with bigger ridges because the excess resin does not have a place to go. I build my first carbon tandem without peelply, and it was a really huge amount of work to get the frame reasonably smooth and even.

Now the real work starts. The peelply comes loose from the frame, but only when you pull really hard on it. My sore fingers do not like it yet, but I want to do it now.
Underneath the peelply I find a nicely textured black surface. This is the frame after half the work has been done:
 And these are the leftovers:
The frame has a few imperfections, but overal I am really happy about it.
Here an overview of the entire frame (the darkness difference between front and back is a problem of the flash, not of the frame):
 In curves around the edges, the peelply has come apart, so you see little V's of bare resin, sometimes with breather bonded to it. This will require some sanding, but not a lot.
 High up on the the rear seat post the carbon has not been pressed completely flat, and a little ridge has formed. I might sand it down as this area will later on be covered by another layer of carbon when laminating the other side.
The area around the bottom bracket is reasonably smooth. I had expected this area to be a potential problem, but it did come about quite well:

The top of the sat tube also has a little ridge, but this will be easily sanded away before I apply the next carbon. The ridge is in a direction than has no real impact on the strength of the frame when I sand it away.

One small other imperfection is a somewhat dry edge on the forward seatpost. The amount of epoxy has been to little here.

The position of the intermeadiate head tube is clearly visible below the laminate. I new this on beforehand and do not mind it. In the matte finish now it is better visible than later on when the frame will have a shiny transparent coating.
Another learning point is that the vacuum tubes leave markings on the frame, as you can see on the lower front of the intermediate head tube. For the other side will will think of a better solution. It is a reminder of the huge forces that are applied by the vacuum (to visualise the force: o.8 bar vacuum is comparable to the weight of 6 VW Golf cars on an average dining table).
 Conclusion: this has been a succes. A large part of the learning curve is behind us now. With a little bit more attention to the details near the seat post we might be able to laminate the other side witout any ridges and the final result will be really good.
First some sanding (in the garden, I do not want the house covered in itchy carbon powder) and then the frame is ready for its next trip into the vacuum. Keep you posted.
No comments:
Post a Comment